GitLab Integration
GitMe cloud integrations are completed after signup from the GitMe panel. If you do not have an account yet, start from GitMe Signup. If you already have an account, continue from GitMe Signin.
You can connect more than one Git integration in GitMe. Your workspace can include multiple providers at the same time, such as GitHub, GitLab, and Bitbucket.
If you need to connect additional GitLab groups or repository access scopes later, repeat this flow from the Integrations page with the appropriate authorized user.
Step 1 - Open the Integrations page
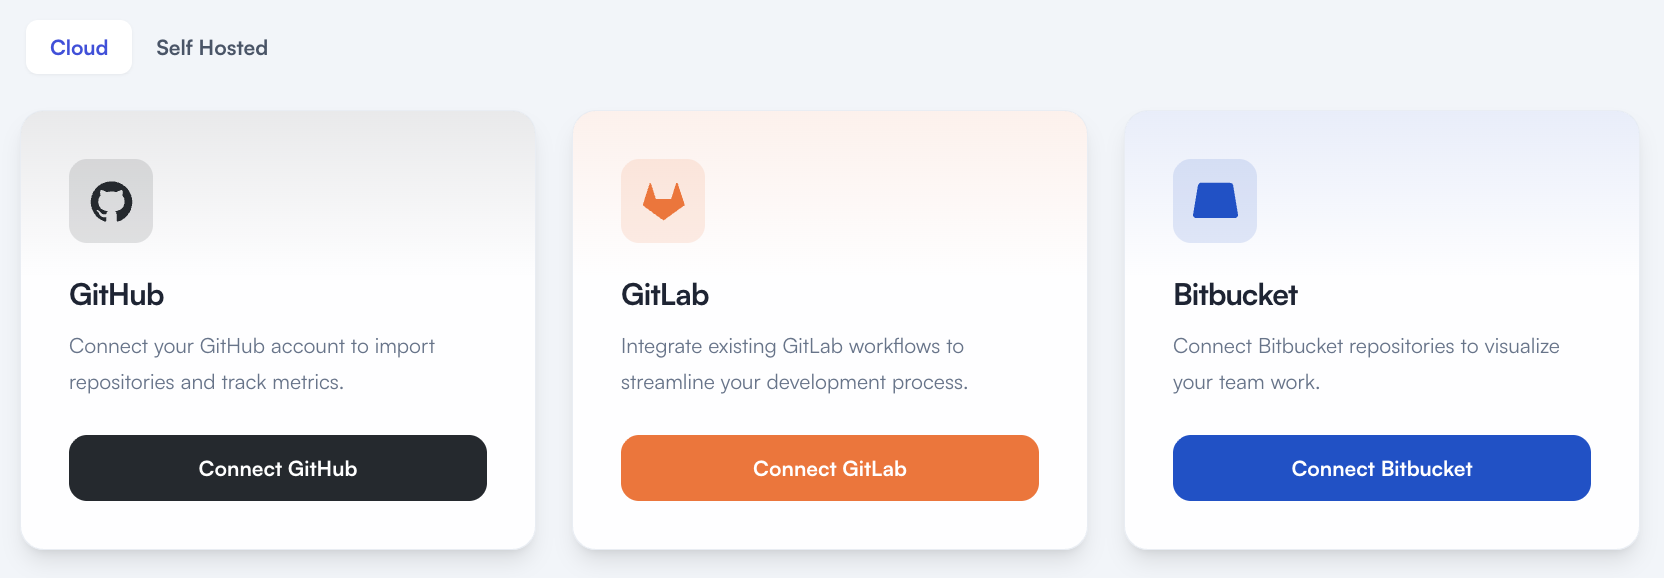
- Sign in to GitMe and go to Settings > Integrations.
- Stay on the Cloud tab and click Connect GitLab.
- This is where the post-signup integration flow starts for GitHub, GitLab, and Bitbucket.
Step 2 - Invite an Account Admin if needed
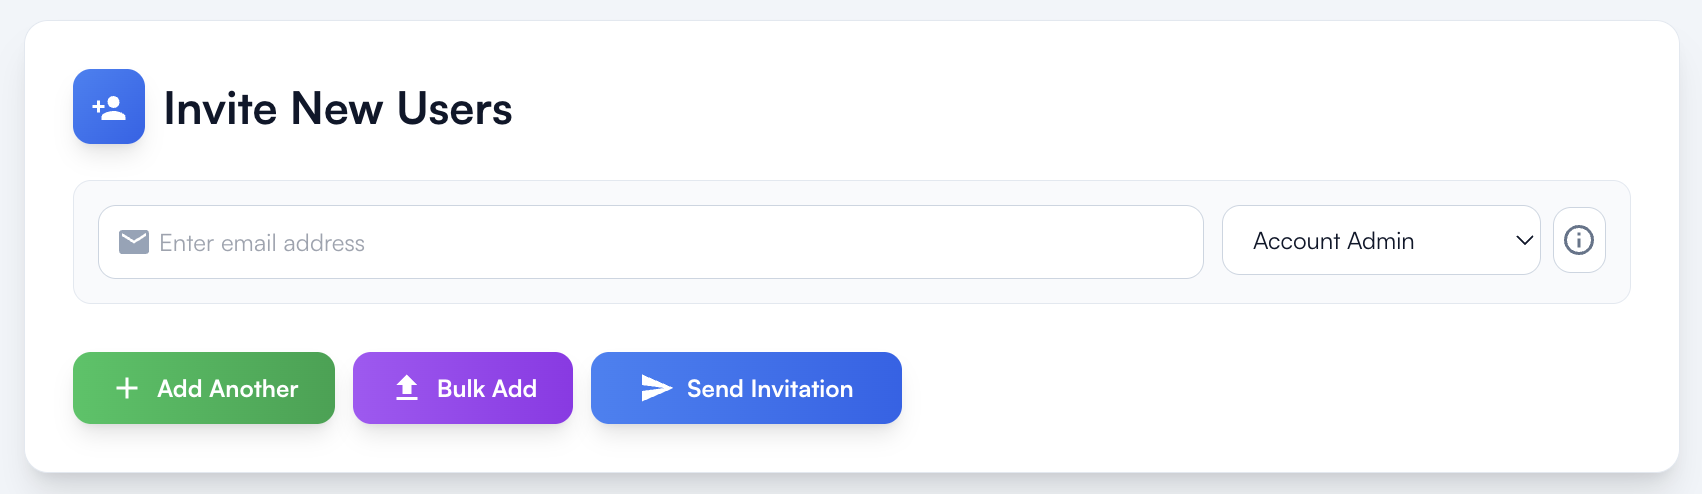
- Open the invite page directly from Settings > Invite User when you need to invite an authorized admin.
- If you are not the Git admin or do not have the permissions required to authorize GitLab for your group or repositories, invite the authorized person first.
- Send the invitation with the Account Admin role.
- After the invite is accepted, that person should continue the GitLab connection steps below.
If the person completing setup cannot authorize GitLab access for the required repositories or groups, they should invite the authorized Git admin as an Account Admin and let that person finish setup.
Step 3 - Authorize GitMe in GitLab
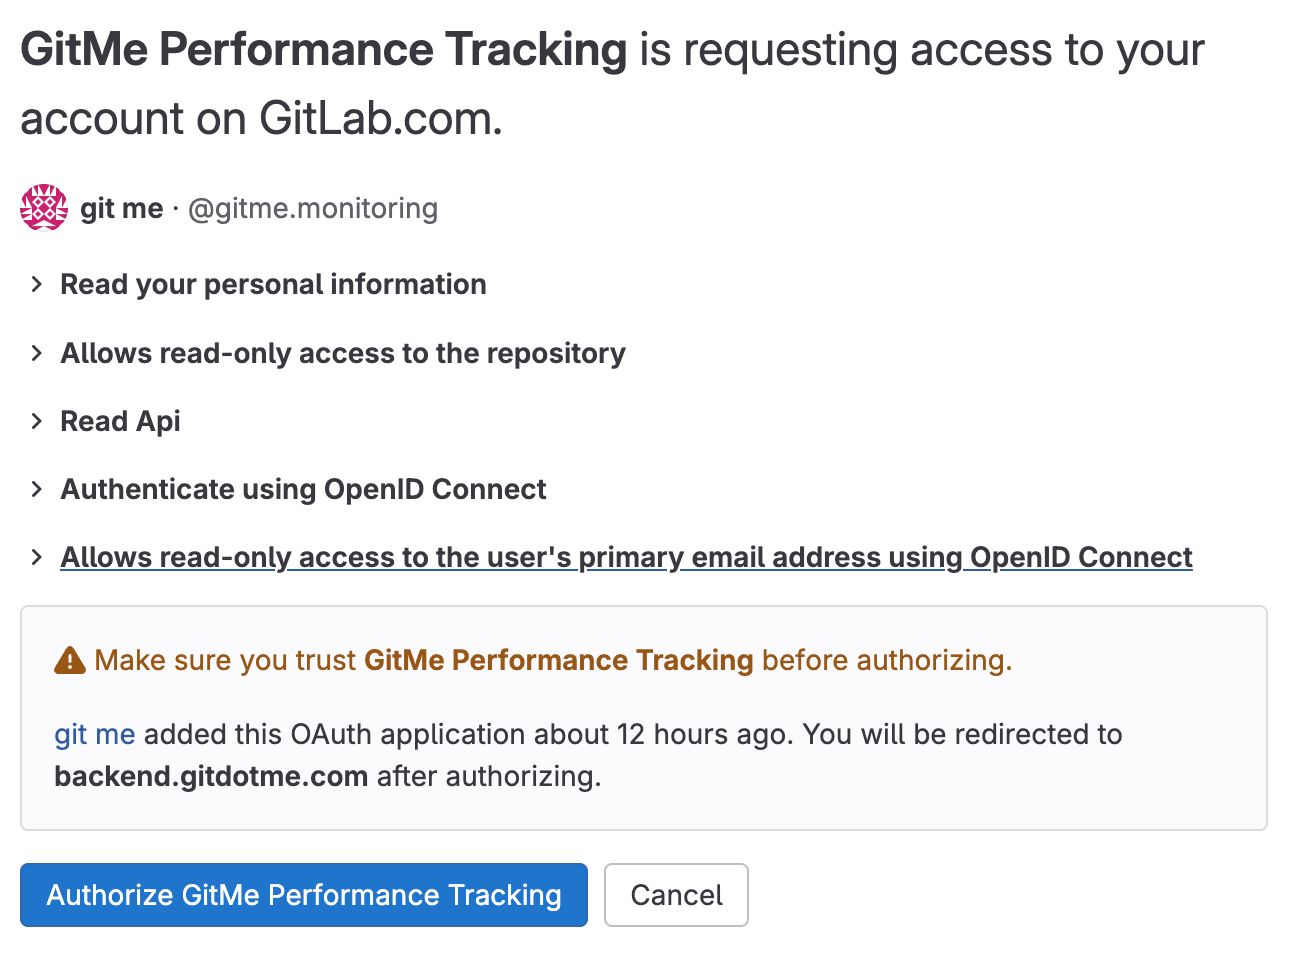
- Clicking Connect GitLab on the Integrations page opens GitLab's official OAuth authorization screen.
- Complete this step with a GitLab user who has access to the repositories you want GitMe to analyze.
Review the requested permissions
- GitMe requests read-only access needed for analytics and repository discovery.
- Requested permissions include reading your basic profile, repositories, API data, and primary email.
- Your code is never changed, deleted, or written to.
- Review the permissions and click Authorize GitMe Performance Tracking.
Step 4 - Choose your plan
- Open the plan page directly from Settings > Plan Configuration.
- After the GitLab integration is connected, continue to plan selection.
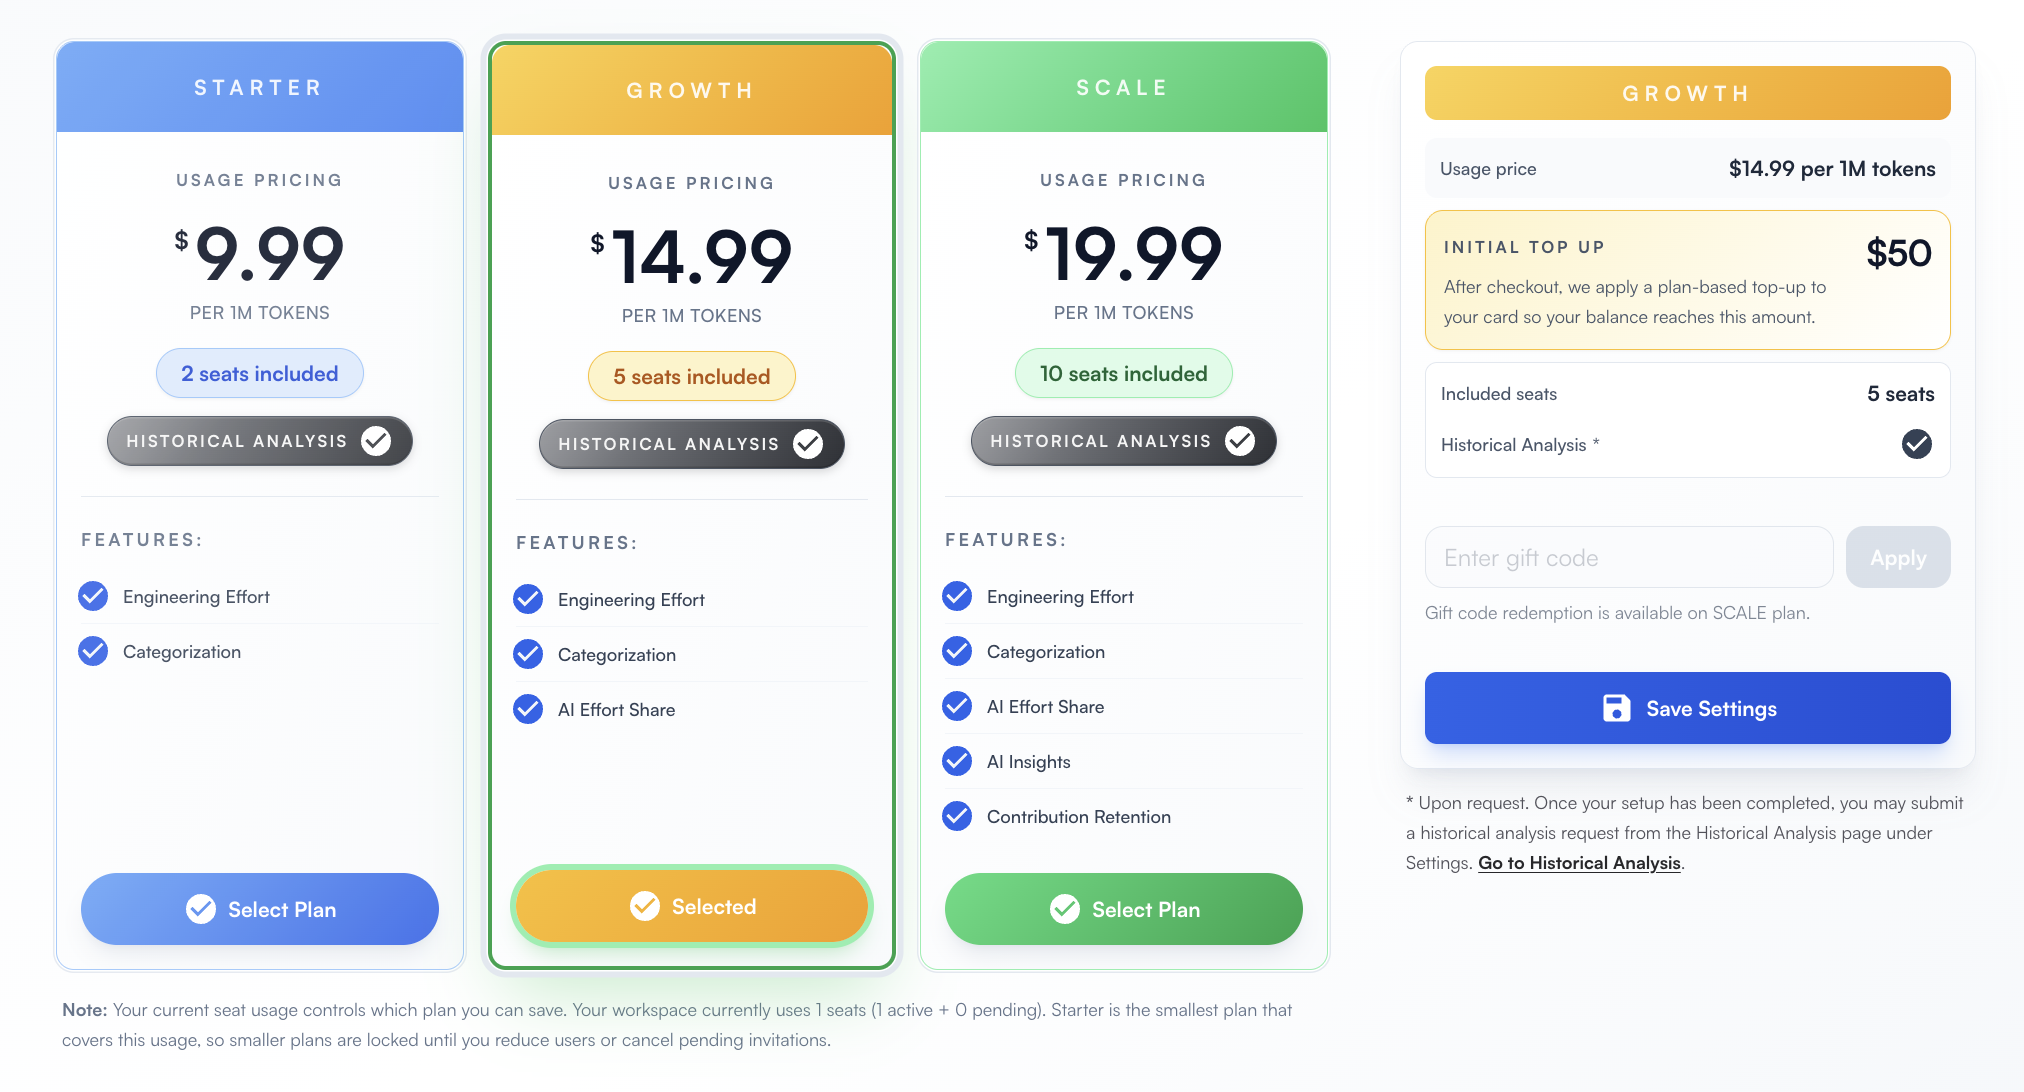
- Choose the plan that matches your team size and analysis needs.
- Save the selected plan to continue to billing.
- Starter includes 2 seats and usage pricing of $9.99 / 1M tokens.
- Growth includes 5 seats and usage pricing of $14.99 / 1M tokens.
- Scale includes 10 seats and usage pricing of $19.99 / 1M tokens.
- For a detailed comparison, see the Pricing page.
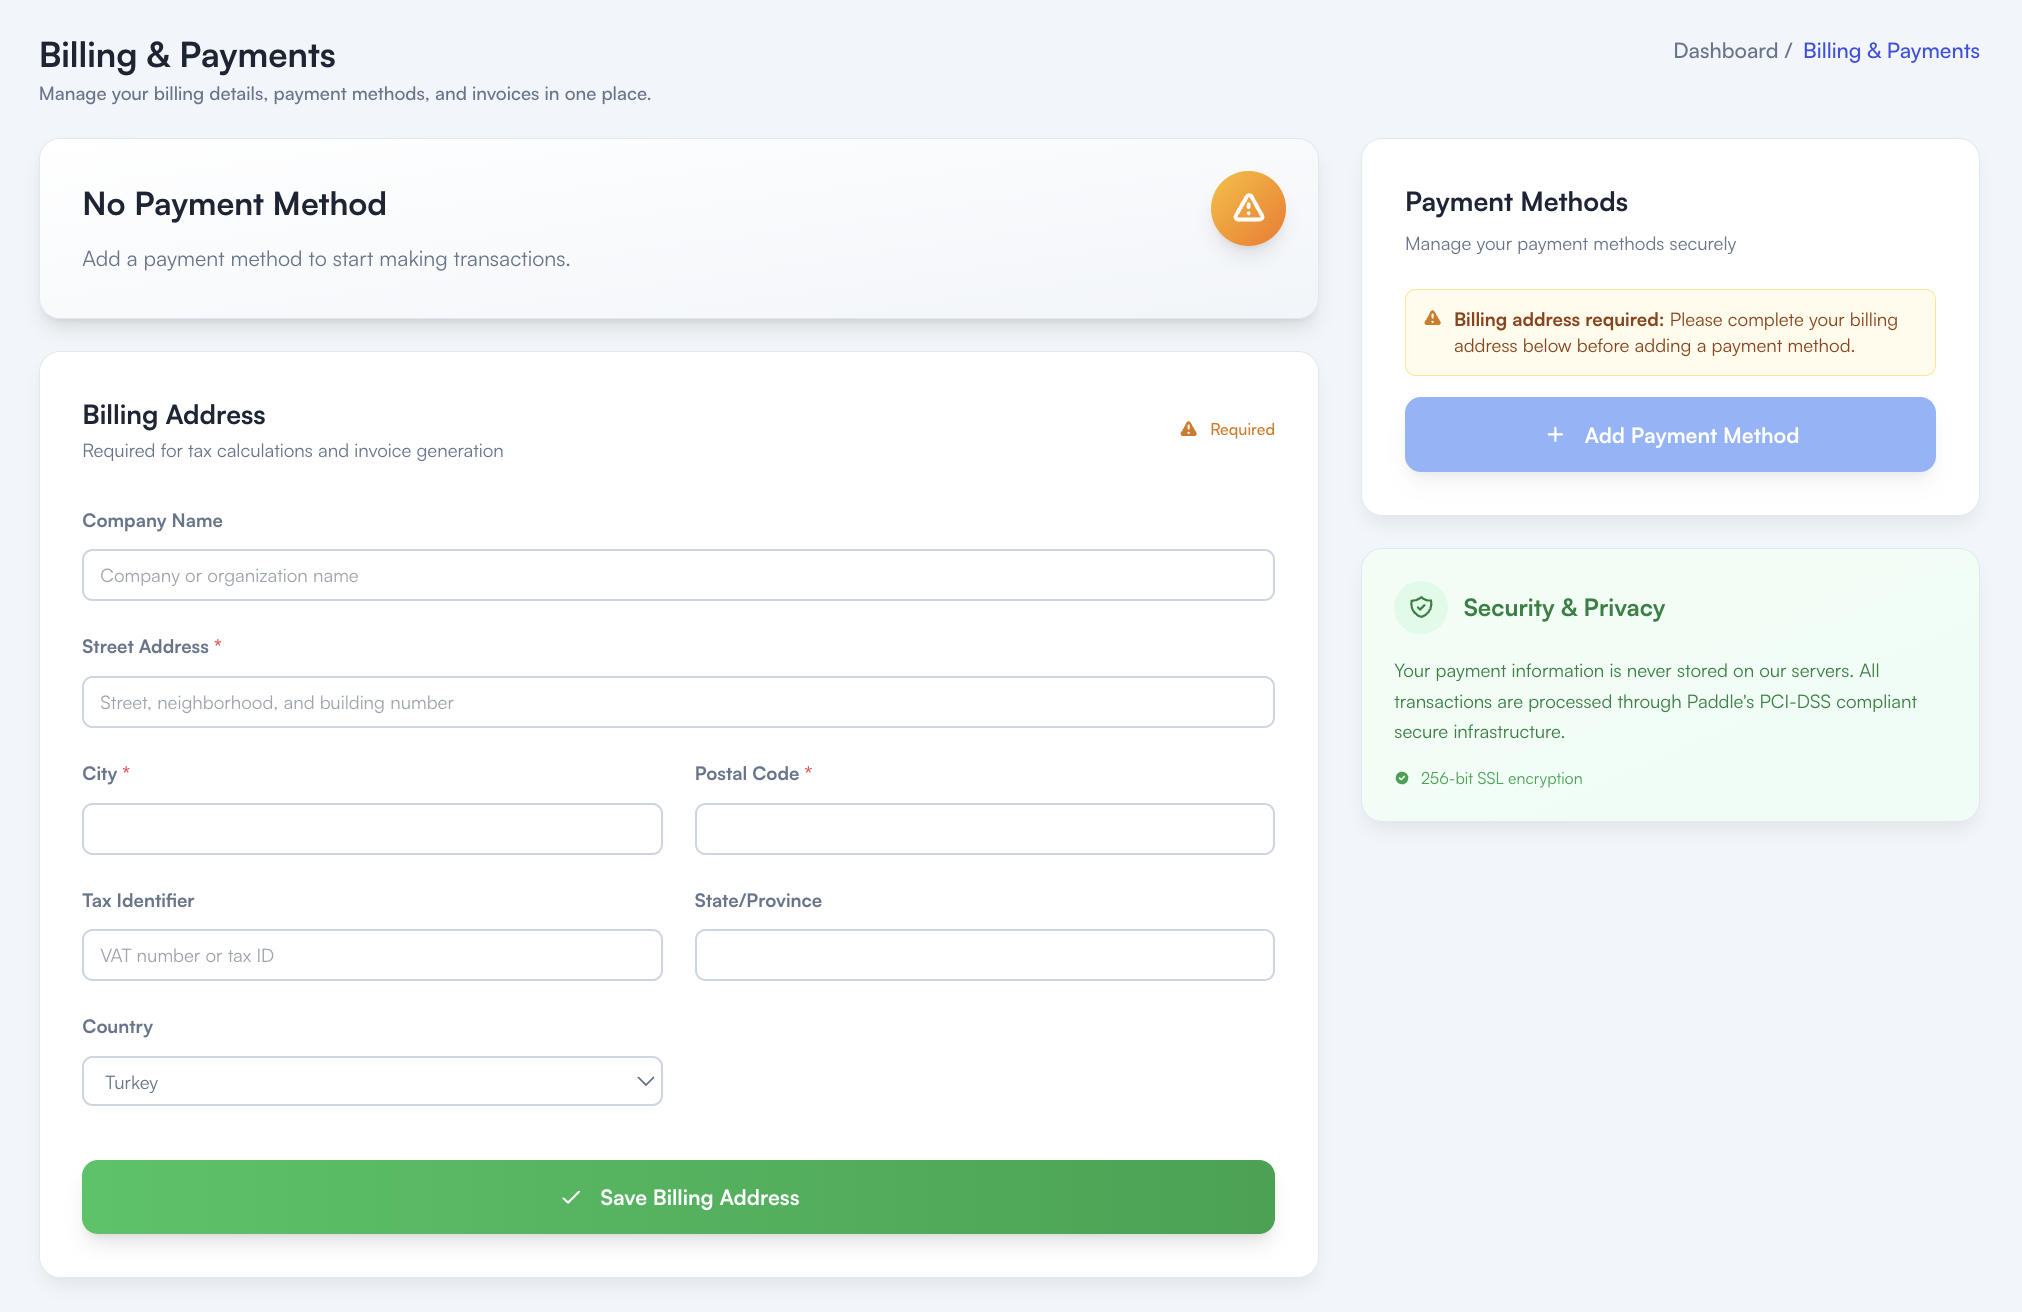
Step 5 - Add billing address and payment method
- Open the billing page directly from Settings > Billing & Payment.
- Enter the billing address required for invoicing and tax calculations.
- After the billing address is saved, add your payment method.
- GitMe uses Paddle's PCI-DSS compliant payment infrastructure for secure payment processing.
You're All Set
Your GitLab integration setup is complete. GitMe can now start syncing the repositories you connected so you can continue with your workspace setup and begin using GitMe analytics.
GitMe standardly starts analysis from the beginning of the month in which your workspace was set up. If you need older commit history to be analyzed as well, see the Historical Analysis documentation.